Template-repository documentation
- MS (Unlicensed)
- Lou M (Unlicensed)
What is a template repository?
A Template Repository contains different virtual machine template definitions ready to download. These appliances are defined by a simplified OVF file. For practical purposes, a template repository space is an index of virtual machine template definitions. This index can be published on the Internet, for public access, or within the Intranet of your company, for secure, controlled access. A template repository allows virtual machine template creators to share their templates with other Abiquo users in multiple datacenters.
For general information about the structure and content of a template repository, see Template repository reference.
Template disk support
What is the template-repository application?
The template-repository application is a side-project developed to work with Abiquo. It provides a user-friendly interface for creating and managing a template repository. The template repository's contents are described in the ovfindex.xml file, which is created and maintained in a database by the template-repository application.
The template-repository application is implemented with version 1.2.4 of the Play! Framework, a lightweight Java Web framework that provides functionality for MVC applications.
Please see Play Framework deployment documentation for more information about deployment options for Play! Framework applications.
Template-repository, OVF and Abiquo
The template-repository application makes it easier to work with virtual machine templates in Abiquo. It is easy to upload a virtual machine template disk file to the template-repository. The template repository automatically detects the disk format and size. Your virtual machine template is now ready for Abiquo users to download directly from the repository.
The template repository application creates an Abiquo .ovf file as described in this table.
Template-repository panel | Abiquo OVF section | Abiquo usage and notes |
|---|---|---|
Product Description | Product Section | Details displayed in the Abiquo Appliance Library |
System Requirements | VirtualSystem | Used to provision the virtual machine. The Ethernet Driver is written to the .ovf file but Abiquo currently uses E1000 only on all hypervisors except ESX/ESXi |
Virtual Disk File | DiskSection and fileRef to disk file | Used to provision the virtual machine. You should not change these values. |
For more information see OVF reference
![]() To download the .ovf file, click the Download OVF button on the Edit screen.
To download the .ovf file, click the Download OVF button on the Edit screen.
Installing and deploying template-repository
To install template-repository you can perform one of these installs:
- full installation and deployment with the Play framework
- module installation and deployment with a Tomcat server or other web application server
Installation guidelines
- Abiquo recommends that you install the template-repository on CentOS 6 but it can also be installed on CentOS 5, for example using the Abiquo Linux distribution
- Abiquo recommends Oracle Java
- You should not install the template-repository on the Abiquo Tomcat server
- You can install the template-repository on a virtual machine, including one deployed with Abiquo
- The template-repository will require enough hard disk space to hold all the uploaded virtual disk files (but not linked virtual disk files)
- Deploy your template repository in a secure environment
Install instructions
Follow the instructions for your chosen install:
Create the main folder
Create the repository main folder. To create the default main folder (/opt/template_repository) use the following command.
mkdir /opt/template_repository
You can configure the main folder in the application.conf file. See #Configuring the main folder
Configuring template-repository
By default the configuration is stored in the template-repository/conf/application.conf file. This file contains more information about the configuration options.
See also the Play! Framework configuration documentation.
Configuring the main folder
The directory where the disk files are stored and be configured by the following setting ovfcatalog.repositoryPath by default /opt/template_repository is the deafult setting.
ovfcatalog.repositorypath=/opt/my_template_repository
Use a MySQL database instead of a directory on the filesystem
By default uses embedded filesystem database (db=fs) you can use MySQL by changing the application.conf file in the directory /template-repository/conf to db=mysql:root:root@templaterepository also use ''jpa.ddl=create'' for the first run use use of the database.
db=fs
Use a different port
Default port is 9000 edit the application.conf file in the directory /template-repository/conf if you require a different port. For example to set the port the 80 the setting would look like the following.
http.port=80
Use Open-ID authentication
By default the template repository application uses Open-ID authentication, edit the application.conf file in the directory /template-repository/conf to change or remove Open-ID authentication. Find the line containing the text "organization.domain". Change the domain information to the value of the organization.domain as required or ADD "#" character to comment this line out for NO authentication. Default example is for abiquo.com, set '#' to comment out the line would look like this.
# organization.domain=abiquo.com
Configure the firewall for access to the application
Allow access to the port configured to access the application in your firewall. By default this is port 9000 but you can configure a different port.
Example firewall configuration using iptables
Unsupported example for guidance only
This information is provided for guidance only. Firewall configuration should be performed by a security expert.
Run this command as root to list the firewall rules
# iptables -L
Modify the rules to allow tcp access to port 9000 (or replace 9000 with your chosen port) and save the configuration
iptables -A INPUT -p tcp --dport 9000 -j ACCEPT
iptables-save
iptables-save > /etc/sysconfig/iptables
service iptables restart
Check the access using the command
netstat -putan
Look for the port that you have configured for template-repository and check that it will accept connections
Testing the template-repository Installation
Browser testing
To test the repository in your browser, go to the address
Example: http://10.81.2.27:9000
Abiquo testing
To test the repository in Abiquo, add the repository to the Appliance Library and check that you can see the appliances. Add the address of the new remote repository URL such as http://my.repository.URL:myPORT/ovfindex.xml . By default the 'name' of the repository will be called 'playrepo' in the Remote Template Repositories list in Abiquo. This can be changed by editing the ovfindex.xml file in the path /opt/template_repository/template-repository/app/views/OVFPackages/ovfindex.xml specifically the RepositoryName="playrepo" setting.
/opt/template_repository/template-repository/app/views/OVFPackages/ovfindex.xml
ns2:RepositoryName="playrepo"
Production configuration
After testing your template-repository deployment, change the following configuration options before going into production. By default the configuration is stored in the template-repository/conf/application.conf file.
Set template-repository to production mode
Change the appplication.mode parameter from dev (development) to prod (production).
# General webapp properties
application.mode=prod
Security
Use a new secret key
To improve security, use a new secret key. Generate one using the play framework (./play secret template-repository) or use another means to generate a new random string of the same length as the one in application.conf.
# Secret key
# ~~~~~
# The secret key is used to secure cryptographic functions
# If you deploy your application to several instances be sure to use the same key !
application.secret=uBaNmOBjR1044vZECcEh9MNo3HJHim4HSOiD0ALZ1JrZhIoVIuEJC9culD2NZvNC
Other security considerations
- Do not open the Play! Framework port of the template-repository to the Internet
- See http://www.playframework.org/documentation/1.2.4/secure for more security information
Using template-repository
Login
If the template-repository has been configured to use OpenID, log in using your google login.
Home screen
The main screen of the template-repository contains a menu for access to template-repository functions and lists the available templates. Click to enlarge the image below.
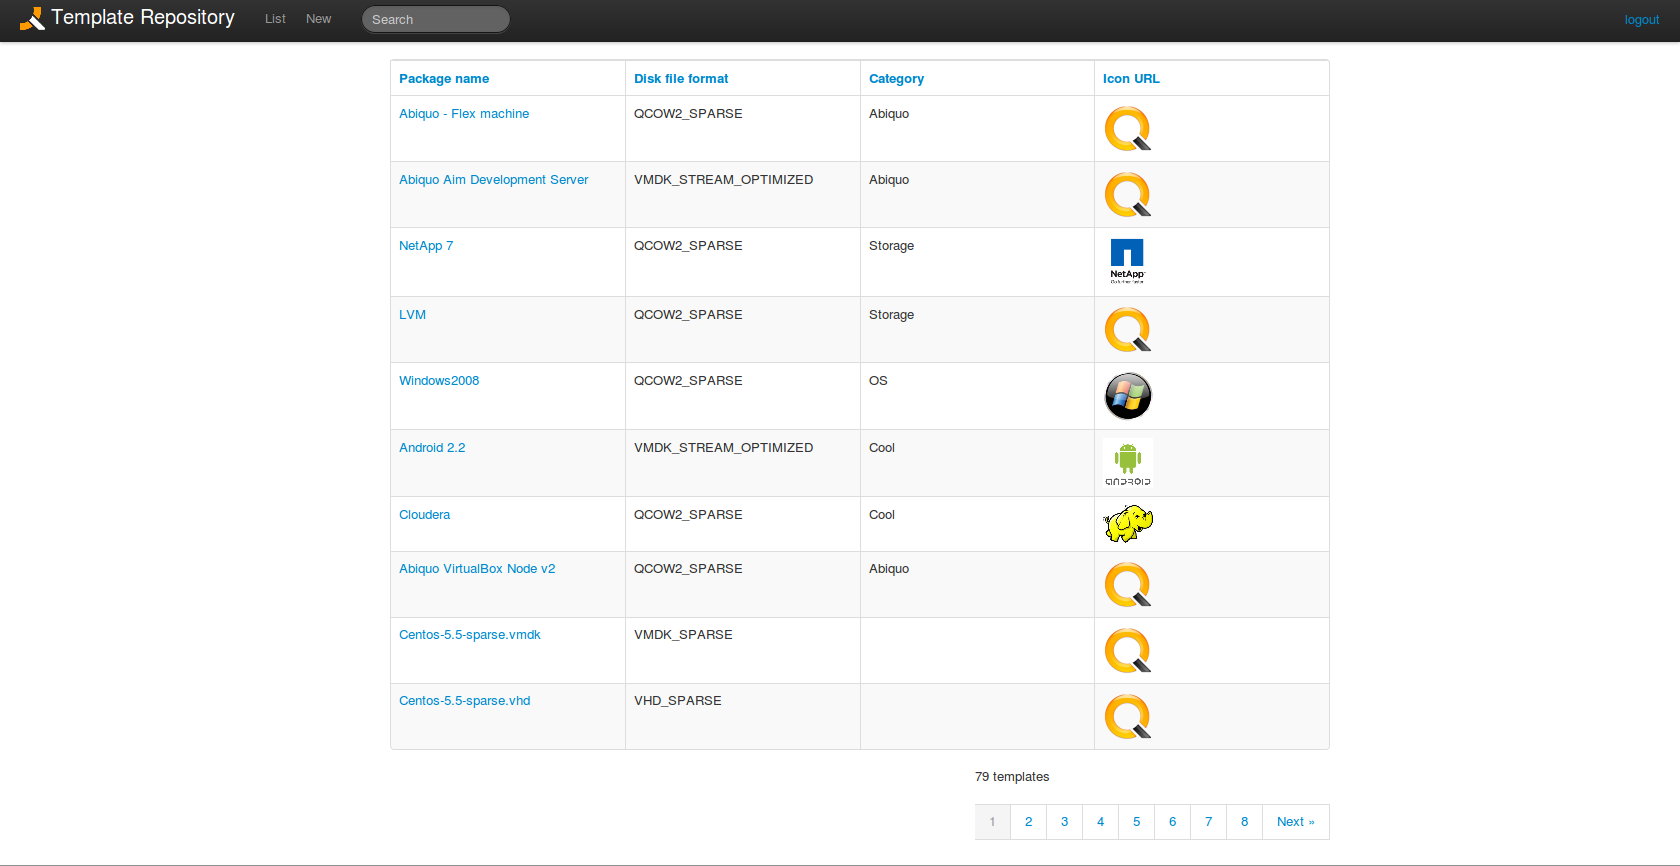
Top menu
The top menu provides the following functions.
On the left side of the screen:

- Title- a link to the /ovfindex.xml, the file containing an index of all the OVF packages added
- List - returns to the list of packages
- New - add a new virtual machine template definition to the template repository
- Search - search for a template definition using the text entered in the search box
If using OpenID, on the right side of the screen:

- Logout - log out of the template repository
Package list
The Package list is a list of all templates with the following information:
- Package name - a link to the package edit screen
- Disk file format - one of the Abiquo formats
- Category - classification, e.g. OS.
- Icon URL - link to icon image file on the Internet in jpeg, png or gif format
Ordering the Package List
Click any of the headings of the columns of the package list to order by that column. Click again to change between ascending and descending order.
Adding a new template
Click New in the main menu to add a new package.
The following dialog will appear:
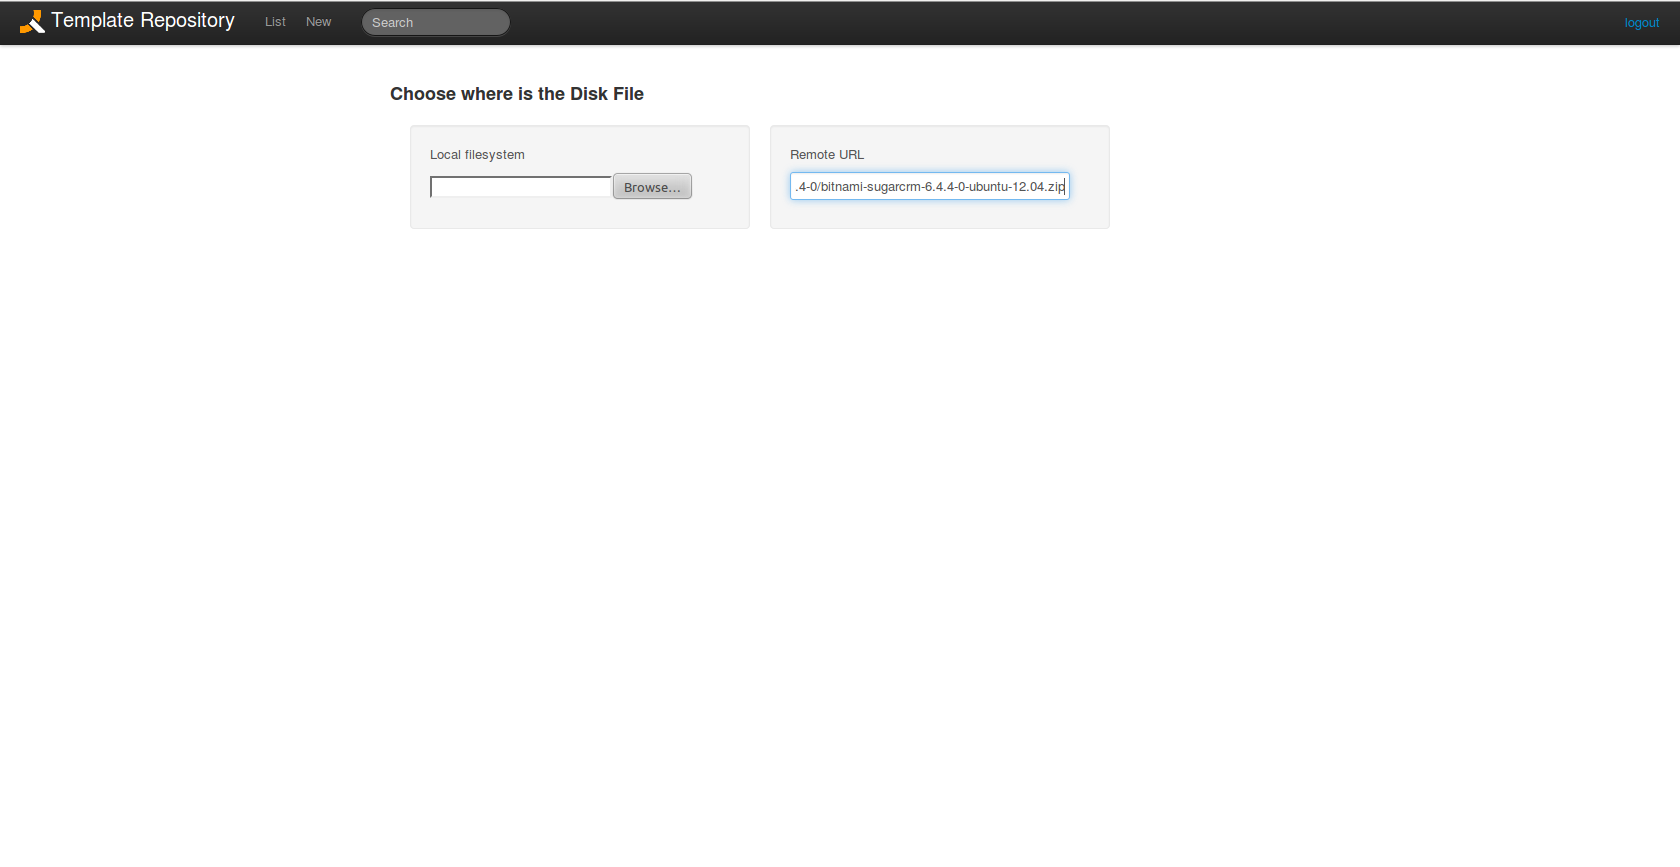
Select the disk file to upload or enter the URL for the disk file.
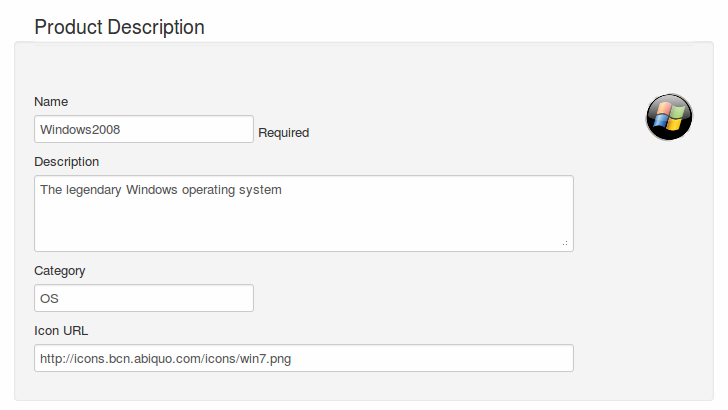
The following screen with the Product Description and System Requirements panels will appear. Enter the details in the Product Description and System Requirements panels for the fields as described in the tables below.
Product description
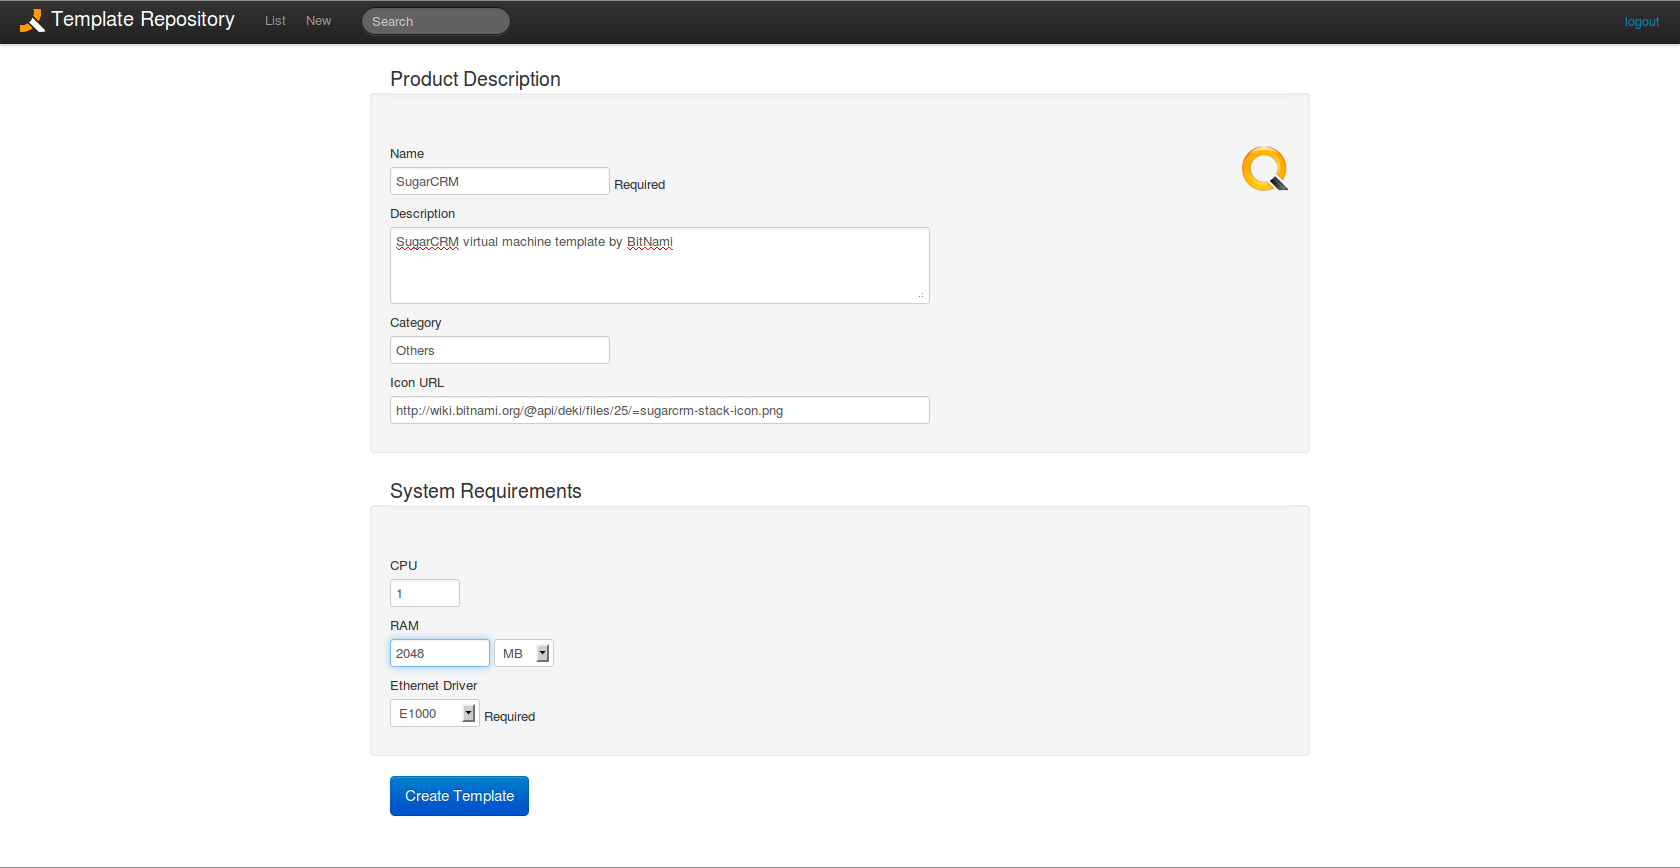
Field | Description |
|---|---|
Format | Format of the virtual template you are uploading. Required field |
Name | Name of the OVF package. It is not necessary for it to match the file name. Required field |
Description | Short description of the package. Usually also includes information such as the login credentials of the template |
Category | Shows which category the template belongs to. Typical values are OS, Firewall, Abiquo, etc |
Icon URL | Points to a URL containing an template, which will be used as an icon for the package |
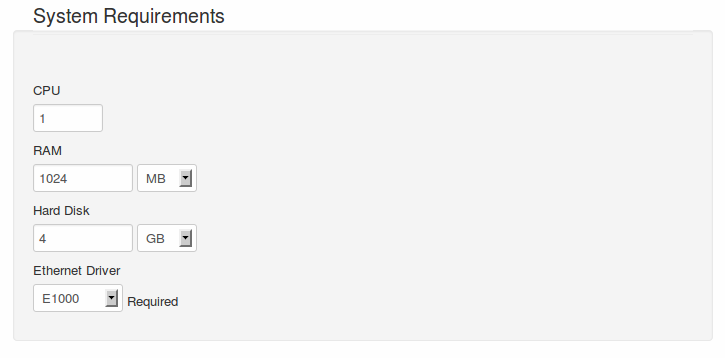
System requirements
Field | Description |
|---|---|
CPU | Number of CPUs the template requires. Required and numeric |
RAM | Amount of memory the template requires. Required and numeric |
MB or GB | Unit of RAM memory |
Ethernet Driver | Required. Default: E1000. This option will be recorded in the .ovf file. However, Abiquo currently uses E1000 for all hypervisors except ESX/ESXi. For ESX/ESXi, select from E1000, PCNet32, VMXNET3 |
After completing these forms, click "Create Template".
Template-repository will use diskid to determine the virtual disk file size.
DiskId is accessed at a IP public address http://diskid.frameos.org/?format=json
If the template repository cannot access this service, follow the instructions in the git rubiojr/diskid repository to start the webservice (based on qemu_img).
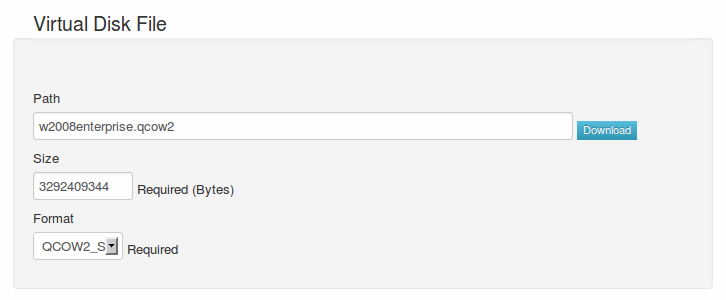
A new Virtual Disk File panel will appear at the bottom of the screen for you to confirm the virtual disk file details.
Virtual disk file
Field | Description |
|---|---|
Path | Path of the file associated with this package. It is best not to change this field, but if you do need to change it, please do so extremely carefully, because an incorrect value could result in an invalid package. This can be a URL or a filename on the local filesystem |
Download button | Click to download the virtual disk file to your machine |
Size | Size of the file associated to this package. It is best not to change this field. If you do need to change it, please do so extremely carefully because this field is used when downloading the template and you could be changing its bounds (start and end point of the disk file). |
Format | One of the Abiquo virtual disk formats. See Template compatibility table |
Confirm the virtual disk file details.
Save or delete a template

Button | Action |
|---|---|
Save | Create a template |
Save and continue editing | Save the template and continue editing |
Delete template | Remove the current template and DELETE the uploaded file |
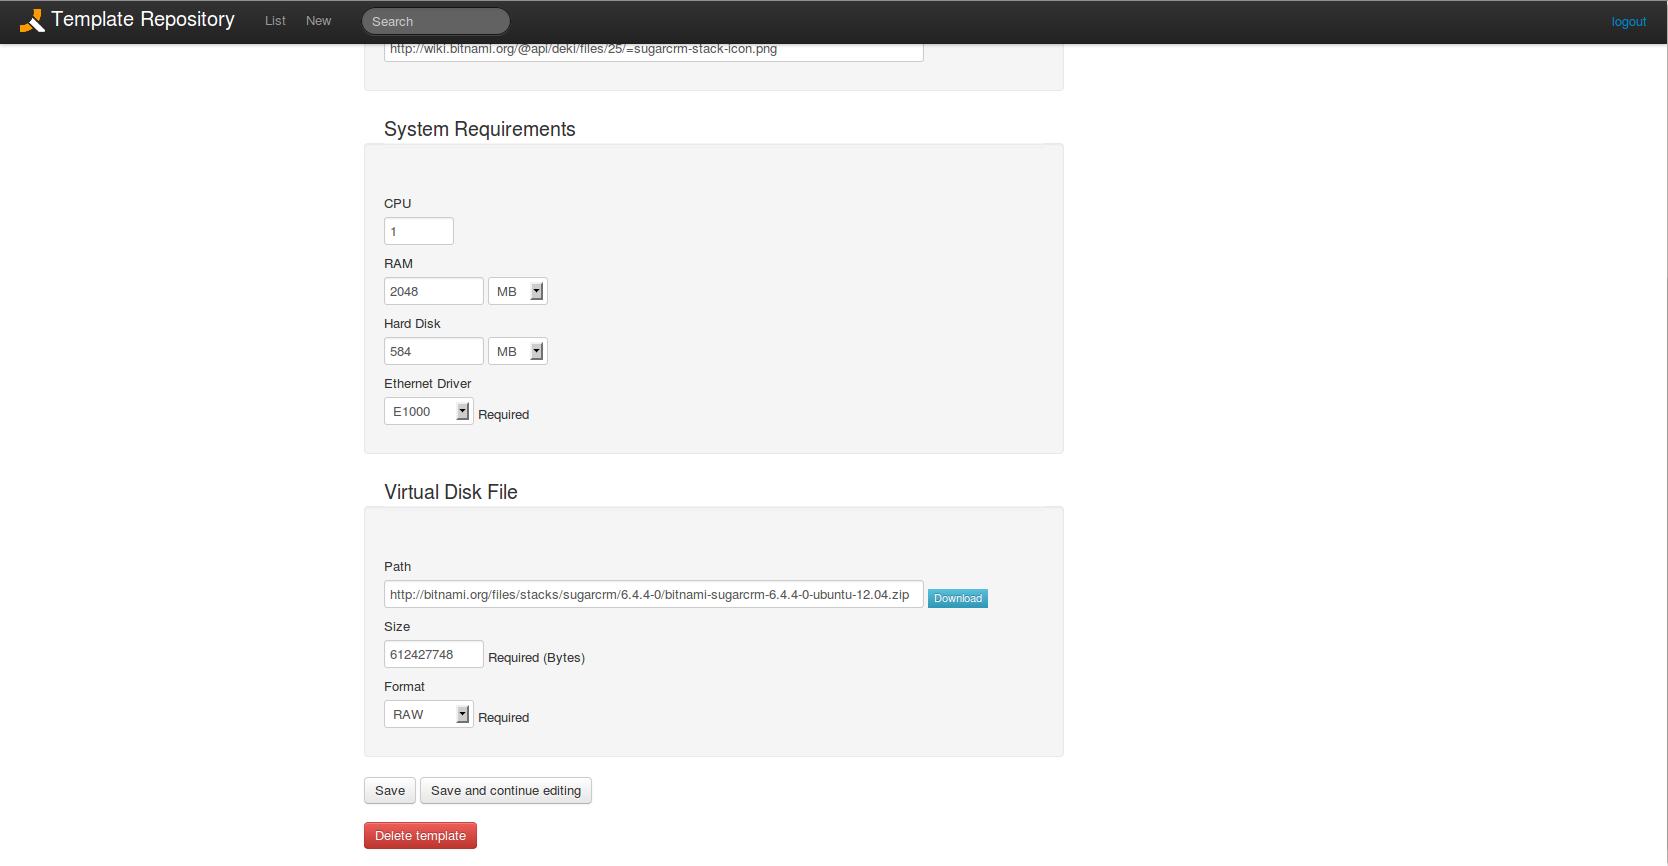
Editing a template
To edit a template, click the template name in the template list.
The edit screen will appear with three edit panels.
These edit panels are the same as those for adding a template: Product Description, System Requirements, Virtual Disk File. The buttons also work in the same way.

The fields and buttons are the same as the ones described above
Downloading a virtual disk file
From the Edit screen, go to the Virtual Disk File panel and click the blue Download button beside the Path field to download the virtual disk file to your system.
Downloading a .ovf file
![]() On the Edit screen, go to the Virtual Disk File panel and click the Download OVF button near the Path field to download the virtual disk file to your system.
On the Edit screen, go to the Virtual Disk File panel and click the Download OVF button near the Path field to download the virtual disk file to your system.
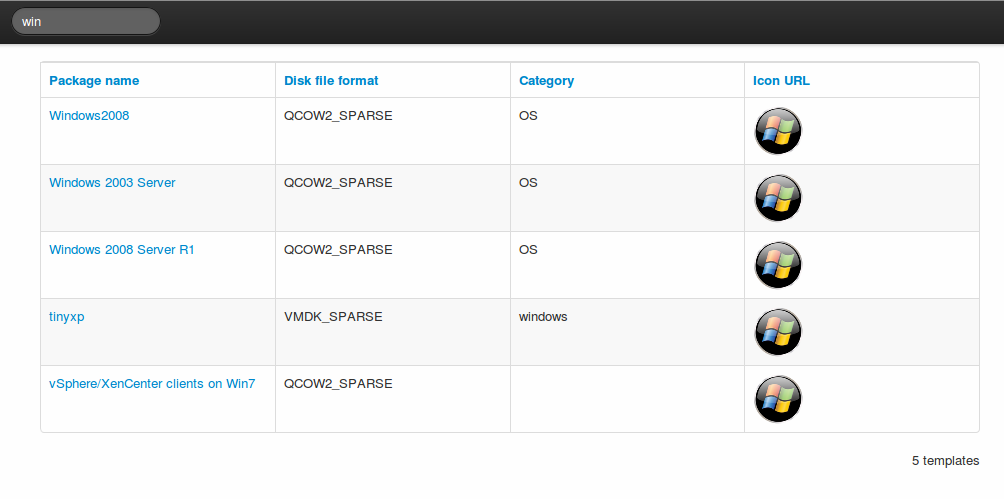
Searching for a template
Enter text in the search box to find templates with that text in the template details fields.
For example, the image below shows a search for "win". The result includes several Windows templates and a template without Windows in the name but included in the category Windows.
Copyright © 2006-2024, Abiquo Holdings SL. All rights reserved